
Introduction:
Today, taking a screenshot has become a very important task of daily life. Whether you need to send proof of an error, save a receipt of an online payment, capture a moment in a game, or save some important information from your devices, screenshots are useful everywhere.
If you are using a Windows 10 or Windows 11 laptop/PC, there are many ways to take a screenshot. So many people only know about the PrtScn key, but Windows offers much more advanced and easier methods to capture screenshots.
If you don’t know how to screenshot on Windows, this detailed guide will help you understand almost all the ways to take a screenshot in Windows 10 and Windows 11 step by step.
What is a screenshot?
It means taking a photo of the visible screen area on your computer, laptop, or mobile screen. It is also called “screen capture” or “screen grab.”
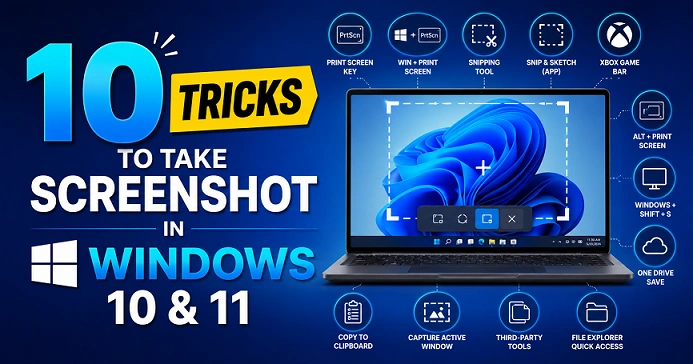
10 Tricks to take a screenshot on Windows.
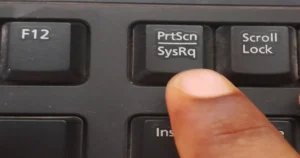
1. Using a print screen (PrtScn) key in your keyboard
It is one of the oldest and easiest ways to take a screenshot on your Windows computer or laptop.
- Keyboard shortcut key: 👉 PrtScn
[Image credit: Ravi Deogam]
How to take a screenshot?
👉 Step 1:
Press PrtScn on your keyboard.
👉 Step 2:
Paste it wherever you want, like in Word, Paint, or any image editing software, using the keyboard shortcut Ctrl + V or using the mouse right-click and choosing the paste option.
| Pro
👍 So easy 👍 Works on every Windows PC and laptop. |
Cons
👎 Did not auto-save screenshots. 👎 Manual paste required |
2. Using Windows key with PrtScn (Window key + PrtScn)
- Keyboard shortcut key: 👉 Window key + PrtScn
What will happen after the key press?
The monitor display will blink once, and it will save to desktop ➡️ pictures ➡️ screenshots folder
| Pros
👍 Instantly the image will be saved in the screenshots folder. |
Cons
No cons |
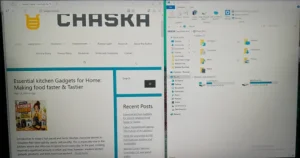
3. Using Alt key and Print screen key to screenshot on PC
- Keyboard shortcut key: 👉 Alt + PrtScn
[Image Credit: Ravi Deogam]
If you want to capture only one open active window, then use this keyboard shortcut to take the screenshot.
When you press the shortcut key. It will take a screenshot of only the active window; other windows will stay untouched by this shortcut key. After that, you have to paste it manually in Word, Paint, Photoshop, or any image editing software to save it; simply click Ctrl + V on your keyboard to paste.
Example:
👉 Step 1:
Let you open the browser and paint simultaneously.
[Image credit: Ravi Deogam]
👉 Step 2:
And if you want to take a screenshot of the browser, then you just choose the active window from the cursor
👉 Step 3:
Now, press Alt + PrtScn on your keyboard to copy the screen.
👉Step 4:

[Image Credit: Ravi Deogam]
Now, paste using the Ctrl + V shortcut key to paste in Paint to save the image.
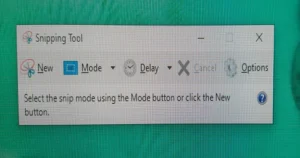
4. Using snipping tools to take screenshot
In a Windows computer (PC) and laptops, it comes pre-installed in the Windows OS.
How to find it:
👉 Press the Windows key to open the search bar and search for “Snipping Tool.”
Or
👉 Open the start menu and click the search bar to search for “Snipping tool.”
The Snipping Tool interface:
[Image Credit: Ravi Deogam]
New Option:
To take the new screenshot.
Mode Option:
- Free-form snip
- Rectangular snip
- Window snip
- Full-screen snip
Delay option:
It is the timer to take a screenshot.
- 1 second
- 2 seconds
- 3 seconds
- 4 seconds
- 5 seconds
Option button:
It has various application options to choose from according to your needs, and here you can also select the ink color for selection.
5. Using Windows, shift and S shortcut keys
- Keyboard shortcut key: 👉 Windows + Shift + S
This is one of the modest tricks or methods to take a screenshot on Windows.
What will happen when you use this trick
- The screen will become dim.
- At the top the snipping bar will open. With options:
- Rectangular snip
- Freeform snip
- Window snip
- Full-screen snip

[Image Source: Ravi Deogma]
- After that, the cursor appears to select the area, and after selection, the image will automatically be saved.
Where will the screenshot be saved?
It will save into the clipboard; after that, you can click on the notification to edit the image.
6. Using Xbox Game Bar
- Keyboard shortcut key:
👉 Windows key + G
👉 Windows key + Alt + PrtScn
What will happen when you press the keys?
For Windows key + G
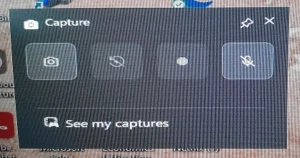
[Image credit: Ravi Deogam]
When you use this shortcut key, the capture window will appear. Where the options are:
- Take a screenshot.
- Record last 30 seconds.
- Start recording.
- Turn mice on while recording
Here you can also see your open window name and you can see all your captured images and videos by clicking the “See my captures” button.
For Windows key + Alt + PrtScn
After using this trick, the Game Bar window will pop up, and when you click this pop-up window, the above options will appear.
Where will it save?
➡️ Video > Captures
Read also: Did you know BlaBlaCar is the best online carpooling service? Overview.
7. Use function key and PrtScn for Windows laptops
- Keyboard shortcut key:
👉 Fn key + PrtScn
Or
👉 Fn key + Windows key + PrtScn
Some of the laptops work differently, so I provided the above two tricks to take screenshots for Windows laptops.
8. Trick for the Microsoft Surface devices
If you own the Microsoft Surface device, then you should use this shortcut trick to take a screenshot.
- Keyboard shortcut key 👉 Power + volume up
The screenshot will automatically save.
9. Using third-party screenshot tools
If you want a screenshot of your desire areas, then you must use third-party screenshot software.
Most popular tools that are available in the Microsoft Store are the following:
- ShareX
- Screenshot HD: Click here
- Screen Record
10. How to take screenshot in a browser
To take a screenshot in a browser, there are methods that you can use.
Developer Tool Method
Keyboard shortcut key:
👉 Ctrl + Shift + I
👉 Ctrl + shift + P
Using Extensions
- Screenshot: Click Here
- GoFullPage
- CoCoShot: For screenshot and screen recording
Best screenshot shortcut in Windows 10 and Windows 11
| Screenshot Area | Best Trick |
| Full screen | Windows key + PrtScn |
| Selected area | Windows + Shift + S |
| Active Window | Alt + PrtScn |
| Gaming | Xbox game bar (Windows key + G) |
| Professional Uses | ShareX (app available in Microsoft store) |
Conclusion
There are many easy and advanced ways to take screenshots in Windows 10 and Windows 11. But if you want to take a screenshot quickly, then Windows + Shift + S is the best option. For autosave, Windows + PrtScn is a great shortcut.
If you want to use screenshots for content creation, then use tools like ShareX and Greenshot, and for gamers, Xbox Game Bar is very useful.
If you learned all of these methods, you will be able to take screenshots easily in any situation.
Read also: 10 most useful apps to download for Android phones.
Final Word
Hopefully, this detailed guide will help you understand all the ways to take screenshots in Windows 10 and Windows 11. Whether you are a student, gamer, office user, or content creator, the right screenshot method can make your work faster and easier.
If you found this information useful, be sure to share it with your friends and family so that they can also learn easy tricks for taking screenshots in Windows. Also, keep visiting our website regularly for technology, Windows tips, laptop tricks, and useful guides.